This blog explains usage of FormBuilder, Validators, FormGroup classes in Angular 2 projects. In this post we will create HTML form and use Angular 2 classes to validate and post the data to Node server.
Consider this app to be broken down in to two parts. First part is the Angular 2 part which consist of user form and other front end communication things. Second part is the Node.js server which will receive the data from the Angular 2 form. Lets begin with first part consisting of user form and communication service using Angular 2.
Setting up the project and Angular environment can be done referring to my previous blog on Angular 2 routing. We will be using angular-cli for this purpose. Let's begin by generating the project using command "ng new *project-name* --routing". Please refer below screen-shot for more information on success of project creation.

By default any new angular-cli blank project renders app.component. App component is the default root component for project. We will not be creating any new component for using the forms but we will modify the app.component. Every component in Angular 2 has a template which contains the view of the component. We will modify the template or view of app.component. The templates in Angular 2 by default are HTML files. We will add a form with two input fields and a submit button as shown below:
app.component.html
If we refer the above form, we can see few attributes from Angular 2 have been added to validate the form and submit it. FormGroup is used to define forms in Angular, along with FormControl. The user should be able to submit this form after filling it in. The Submit button at the bottom of the form does nothing on its own, but it will trigger a form submit because of its type (type="submit").
To submit the form data to node.js server, we will need Angular 2 service which will be used for connecting to the node server. Services are JavaScript functions that are responsible for doing a specific task only. Angular services are injected using Dependency Injection mechanism and include the value, function or feature which is required by the application.
We can create service using angular-cli command "ng g service submitform". Once execution of this command is complete a service file is created with the name "submitform.service.ts". We will use HTTP protocol for server communication.

submitform.service.ts
Referring to above code "submitFormData(data)" is the public function which will be accessed by app.component. This function is using POST method for sending form data to node server. The parameter "data" is the information from the app.component.html form fields. Function "submitProcessComplete" is the callback function after response from node.js server is received. Once our service is ready for usage, we will need to add this service to providers list in "app.module.ts" file.
app.module.ts
Now we are ready to use submitform.service.ts file. Since our form is added in to app.component.html, we will use this service in app.component.ts file.
app.component.ts
Referring to the code above, we are creating here FormGroup and FormControl to manage our Angular 2 form. The validation of the form elements are done using Validators. Lets look into form tag again for more clarification, focus on yellow highlighted items.
Now, we have everything ready from the Angular 2 side which was first part of this blog post. All the details shared above are frontend showing how Angular 2 form is added and connected to service which will be sending the data to the node.js server. If we closely look into "submitform.service.ts" file, we see how the HTTP connection is being established to the server, focus on yellow highlighted items.
Referring to the code above, the HTTP post method is pointing to our server route which we will be creating in the second part of this blog.
To start creating a node.js server, let us create a folder named "server". This folder will contain all our node.js server code and dependencies. To initialize a node.js project navigate to the server folder and run the command "npm init". After this we will install few dependencies depending upon our requirements. In case of this post, we will need "express" and "body-parser" dependencies. We can install each of these dependencies by running the command "npm install *dependency-name* --save".

Once our node.js project is configured and ready, we proceed to the main entry point for our node.js app/server which is "index.js". The name of this JavaScript file is not fixed and can be changed at the time of project initialization. We will be adding our code to index.js file so that it listens to a port to which Angular 2 form would be sending the data to. Also, the data send and received between these two apps (Angular 2 and node.js) will be in JSON format.
index.js
Referring to the code above, all the yellow highlighted lines are very important to focus.
The line of code above, defines express server to listen to a port 3200.
The code above, allows all the files in 'app/controllers' folder in 'server' to act as controller. Each controller can independently define their route URLs and act on it as per requirement. For receiving data from our Angular 2 demo-form, we will be creating one controller file. Let us assume the name to be "submitform.controller.js". This controller will just act as a route to receive the HTTP POST data from Angular 2 form and send a response back to the front end.
submitform.controller.js
Refer screen shot below for project structure so far.

Now we have both Angular 2 form(client) and node.js server ready for usage. We will first start our server. Navigate to the server folder and run command "node index". On successful execution we can see result as below screen shot.

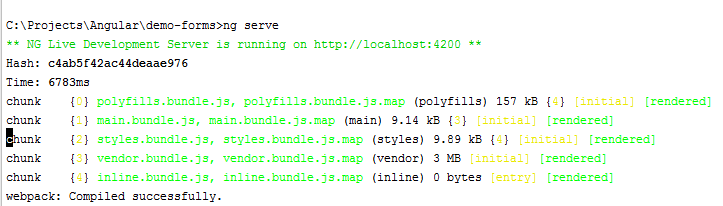
Now we can run our Angular 2 app by using command "ng serve". On successful execution we can see result as below screen shot.

Once both our server and client are running, we can send the data from Angular 2 to node.js and receive a response. The complete working example can be seen in video below:
Download completed project file - Click here
-Nitin
Consider this app to be broken down in to two parts. First part is the Angular 2 part which consist of user form and other front end communication things. Second part is the Node.js server which will receive the data from the Angular 2 form. Lets begin with first part consisting of user form and communication service using Angular 2.
Setting up the project and Angular environment can be done referring to my previous blog on Angular 2 routing. We will be using angular-cli for this purpose. Let's begin by generating the project using command "ng new *project-name* --routing". Please refer below screen-shot for more information on success of project creation.

By default any new angular-cli blank project renders app.component. App component is the default root component for project. We will not be creating any new component for using the forms but we will modify the app.component. Every component in Angular 2 has a template which contains the view of the component. We will modify the template or view of app.component. The templates in Angular 2 by default are HTML files. We will add a form with two input fields and a submit button as shown below:
app.component.html
<div class="container formcontainer">
<h1>
  {{title}}
</h1>
<form [formGroup]="userform" (ngSubmit)="onSubmit(userform.value)">
  <input class="form-control" type="text" name="fname" [formControl]="userform.controls['firstName']" />
  <input class="form-control" type="text" name="lname" [formControl]="userform.controls['lastName']" />
  <div style="margin-bottom: 1em">
    <button type="submit" [disabled]="!userform.valid" class="btn btn-success">Send Data</button>
  </div>
</form>
</div>
If we refer the above form, we can see few attributes from Angular 2 have been added to validate the form and submit it. FormGroup is used to define forms in Angular, along with FormControl. The user should be able to submit this form after filling it in. The Submit button at the bottom of the form does nothing on its own, but it will trigger a form submit because of its type (type="submit").
To submit the form data to node.js server, we will need Angular 2 service which will be used for connecting to the node server. Services are JavaScript functions that are responsible for doing a specific task only. Angular services are injected using Dependency Injection mechanism and include the value, function or feature which is required by the application.
We can create service using angular-cli command "ng g service submitform". Once execution of this command is complete a service file is created with the name "submitform.service.ts". We will use HTTP protocol for server communication.

submitform.service.ts
import { Injectable } from '@angular/core';
import { Http, Response, Headers, RequestOptions } from '@angular/http';
import 'rxjs/add/operator/map';
@Injectable()
export class SubmitformService {

  constructor(private http: Http) { }

  public submitFormData(data){
    var headers = new Headers();
    let body = data;
    headers.append('Content-Type', 'application/json');
    this.http
      .post('http://localhost:3200/api/submitform', body, { headers: headers })
      .map(response => response.json())
      .subscribe(
        response => this.submitProcessComplete(response)
      )
  }

  private submitProcessComplete(serverResponse) {
    console.log("Response from serve ",serverResponse)
  }
}
Referring to above code "submitFormData(data)" is the public function which will be accessed by app.component. This function is using POST method for sending form data to node server. The parameter "data" is the information from the app.component.html form fields. Function "submitProcessComplete" is the callback function after response from node.js server is received. Once our service is ready for usage, we will need to add this service to providers list in "app.module.ts" file.
app.module.ts
import { BrowserModule } from '@angular/platform-browser';
import { NgModule } from '@angular/core';
import { FormsModule } from '@angular/forms';
import { HttpModule } from '@angular/http';
import { ReactiveFormsModule } from '@angular/forms';
import { AppRoutingModule } from './app-routing.module';
import { AppComponent } from './app.component';
import {SubmitformService} from "./submitform.service";

@NgModule({
  declarations: [
    AppComponent,
  ],
  imports: [
    BrowserModule,
    FormsModule,
    HttpModule,
    AppRoutingModule,
    ReactiveFormsModule
  ],
  providers: [SubmitformService],
  bootstrap: [AppComponent]
})
export class AppModule { }
Now we are ready to use submitform.service.ts file. Since our form is added in to app.component.html, we will use this service in app.component.ts file.
app.component.ts
import {Component, OnInit} from '@angular/core';
import {FormBuilder, Validators, FormGroup, FormControl} from '@angular/forms';
import {SubmitformService } from "./submitform.service"

@Component({
  selector: 'app-root',
  templateUrl: './app.component.html',
  styleUrls: ['./app.component.scss']
})
export class AppComponent implements OnInit  {
  title = 'Reactive Forms!';
  userform: FormGroup

  constructor(public fb: FormBuilder, private submitformservice:SubmitformService){
    this.userform = fb.group({
      'firstName' :  [null, Validators.required],
      'lastName':  [null, Validators.compose([Validators.required, Validators.minLength(5), Validators.maxLength(10)])]
    })
  }
  ngOnInit() {
  }
  private onSubmit(value:any) {
    this.submitformservice.submitFormData(value);
  }
}
Referring to the code above, we are creating here FormGroup and FormControl to manage our Angular 2 form. The validation of the form elements are done using Validators. Lets look into form tag again for more clarification, focus on yellow highlighted items.
<form [formGroup]="userform" (ngSubmit)="onSubmit(userform.value)">
  <input class="form-control" type="text" name="fname" [formControl]="userform.controls['firstName']" />
  <input class="form-control" type="text" name="lname" [formControl]="userform.controls['lastName']" />
  <div style="margin-bottom: 1em">
    <button type="submit" [disabled]="!userform.valid" class="btn btn-success">Send Data</button>
  </div>
</form>
Now, we have everything ready from the Angular 2 side which was first part of this blog post. All the details shared above are frontend showing how Angular 2 form is added and connected to service which will be sending the data to the node.js server. If we closely look into "submitform.service.ts" file, we see how the HTTP connection is being established to the server, focus on yellow highlighted items.
public submitFormData(data){
    var headers = new Headers();
    let body = data;
    headers.append('Content-Type', 'application/json');
    this.http
      .post('http://localhost:3200/api/submitform', body, { headers: headers })
      .map(response => response.json())
      .subscribe(
        response => this.submitProcessComplete(response)
      )
  }
Referring to the code above, the HTTP post method is pointing to our server route which we will be creating in the second part of this blog.
To start creating a node.js server, let us create a folder named "server". This folder will contain all our node.js server code and dependencies. To initialize a node.js project navigate to the server folder and run the command "npm init". After this we will install few dependencies depending upon our requirements. In case of this post, we will need "express" and "body-parser" dependencies. We can install each of these dependencies by running the command "npm install *dependency-name* --save".

Once our node.js project is configured and ready, we proceed to the main entry point for our node.js app/server which is "index.js". The name of this JavaScript file is not fixed and can be changed at the time of project initialization. We will be adding our code to index.js file so that it listens to a port to which Angular 2 form would be sending the data to. Also, the data send and received between these two apps (Angular 2 and node.js) will be in JSON format.
index.js
// call the packages we need
var express     = require('express');
var bodyParser  = require('body-parser');
var app         = express();
var fs       = require('fs');
var path      = require('path');
var http   = require('http');

app.use(function(req, res, next){
  res.setHeader('Content-Type', 'application/json')
  // Domain you wish to allow
  res.setHeader('Access-Control-Allow-Origin', 'http://localhost:4200');
  // Request methods you wish to allow
  res.setHeader('Access-Control-Allow-Methods', 'GET, POST, PUT, DELETE, OPTIONS');
  // Set to true if you need the website to include cookies in  requests
  res.setHeader('Access-Control-Allow-Credentials', true);
  res.header('Access-Control-Allow-Headers', 'Content-Type');

  // Check if preflight request
  if (req.method === 'options') {
    res.status(200);
    res.end();
  }else {
    // Pass to next layer of middleware
    next();
  }
});

// configure body parser
app.set('port', process.env.PORT || 3200);
app.use(express.logger('dev'));
app.use(bodyParser.urlencoded({ extended: false }));
app.use(bodyParser.json());
app.use("/api", app.router);
app.use(express.static(path.join(__dirname, 'public')));

// dynamically include routes (Controller)
fs.readdirSync('./app/controllers').forEach(function (file) {
  if(file.substr(-3) == '.js') {
    route = require('./app/controllers/' + file);
    route.controller(app);
  }
});

http.createServer(app).listen(app.get('port'), function(){
  console.log('Server listening on port ' + app.get('port'));
});
Referring to the code above, all the yellow highlighted lines are very important to focus.
app.set('port', process.env.PORT || 3200);
The line of code above, defines express server to listen to a port 3200.
app.use("/api", app.router);
The code above, defines router for the express server.route = require('./app/controllers/' + file); route.controller(app);
The code above, allows all the files in 'app/controllers' folder in 'server' to act as controller. Each controller can independently define their route URLs and act on it as per requirement. For receiving data from our Angular 2 demo-form, we will be creating one controller file. Let us assume the name to be "submitform.controller.js". This controller will just act as a route to receive the HTTP POST data from Angular 2 form and send a response back to the front end.
submitform.controller.js
module.exports.controller = function(app){
 app.post("/submitform", function(req, res){
  console.log("req.body - ",req.body);
  res.json({"info":"data received on server"});
 });
}
Refer screen shot below for project structure so far.

Now we have both Angular 2 form(client) and node.js server ready for usage. We will first start our server. Navigate to the server folder and run command "node index". On successful execution we can see result as below screen shot.

Once both our server and client are running, we can send the data from Angular 2 to node.js and receive a response. The complete working example can be seen in video below:
Download completed project file - Click here
-Nitin


